Training for the Highlands in a flat city isn’t about simulating hills; it’s about conditioning your body and mind for the relentless ‘energy tax’ of Scotland’s unique terrain.
- Focus on stability and eccentric strength to handle bogs, tussocks, and steep descents.
- Master ‘failure-proof’ systems for navigation, safety, and gear to mitigate the high mental load.
Recommendation: Your goal is not just generic fitness, but building specific ‘terrain resilience’ to stay safe, manage energy, and truly enjoy the experience.
You consider yourself fit. You run 10ks in London’s Hyde Park or cycle for hours across the flat landscapes of the Netherlands. You’re ready for the Scottish Highlands, you think. Yet, many experienced flat-land hikers find themselves utterly exhausted and demoralized by a trail marked “moderate” in Scotland. The standard advice—”climb more stairs” or “break in your boots”—barely scratches the surface of what’s required. It fails to account for the fundamental difference in the environment.
The true challenge isn’t the elevation gain alone. It’s the cumulative ‘energy tax’ levied by the landscape itself. Every step that sinks into a bog, every gust of wind on an exposed ridge, and every moment spent deciphering a featureless hillside drains your physical and mental reserves far more than a clean, predictable path. The key to success, therefore, lies not in simply getting stronger, but in building specific terrain resilience. This is about conditioning your body for instability, your gear for relentless wetness, and your mind for constant decision-making under pressure.
As a trekking preparation coach, my approach is to move beyond generic fitness and instill a system of physical and mental readiness. This guide is structured to do just that. We will deconstruct the unique demands of the Highlands, from navigating without technology to understanding why Scottish summer can still be dangerously cold. By focusing on failure-proofing your skills and building true environmental conditioning, you will be prepared not just to survive the Highlands, but to thrive in them.
This article provides a comprehensive coaching framework to prepare you for the real demands of the Scottish Highlands. Below is a structured overview of the key systems we will cover, from navigation and gear to safety protocols and risk management.
Table of Contents: A Flatlander’s Complete Guide to Highland Preparation
- OS Maps App vs Paper Map: Which to Trust When Batteries Die?
- Why ‘Moderate’ in Scotland Is ‘Hard’ Elsewhere?
- Lyme Disease Risk: How to Check Yourself After a Hike in Bracken?
- The Check-In Protocol That Saves Lives for Solo Hikers
- Leather or Synthetic: Which Boot Dries Faster for Multi-Day Hikes?
- The Composition Error That Leads to Falls on Highland Ridges
- Why Summer Weather in Scotland Can Still Cause Hypothermia?
- How to Insure High-Risk Outdoor Activities in Scotland for Non-Residents?
OS Maps App vs Paper Map: Which to Trust When Batteries Die?
In the Highlands, your smartphone is a useful tool, but never your lifeline. The combination of cold, wet conditions and poor signal dramatically increases battery consumption. A case study of Ordnance Survey (OS) Maps users highlighted that continuous GPS tracking in the Highlands can increase battery drain by 300%. A dead phone means no map, no compass, no GPS, and no communication. This is a critical failure that proper training can prevent. The first step in building mental endurance is to remove this single point of failure by mastering traditional navigation.
Your goal is to make the paper map your primary tool and the app your backup. This reduces the mental load of worrying about battery life and forces you to build true situational awareness. Practicing this in your flat, urban environment is not only possible but essential. You must train your brain to connect the symbols on the map with the physical world around you, a skill that translates directly to the subtle contours of a Highland glen. This process is about building a failure-proof system before you even leave home.
Your Urban Navigation Training Drill
- Download an OS map section of your local urban park and print the same area on paper.
- Practice ‘terrain-to-map association’ by identifying 10 urban features (buildings, intersections, elevation changes) on both formats.
- Navigate to 5 waypoints using only the paper map with your phone turned off completely.
- Mark your actual route with a waterproof pen (like Staedtler Lumocolor) on a laminated version of the map.
- Compare your paper navigation accuracy with the GPS track recorded separately on another device or after the drill.
By making this drill a regular part of your training, you move from being a passive follower of a blue dot to an active, engaged navigator. This skill is the foundation of safety and confidence in the Highlands.
Why ‘Moderate’ in Scotland Is ‘Hard’ Elsewhere?
One of the biggest shocks for hikers new to Scotland is the deceptive nature of trail ratings. A five-mile route graded “moderate” can feel significantly harder than a “hard” trail of the same distance in the Alps or the US. The reason is the aforementioned ‘energy tax’. This isn’t about your fitness level; it’s about the ground itself. Unlike the well-defined, engineered paths found in many other hiking destinations, a Scottish trail often consists of bog, tussocky grass, and pathless sections that require constant concentration and physical adjustment.
This type of terrain forces your body to work much harder. Your stabilizer muscles are constantly firing to prevent a twisted ankle, and each step requires more energy to lift your foot from boggy ground. This constant, low-level effort accumulates, leading to premature fatigue. The mental load of continuous route-finding, with no clear path to follow, further drains your reserves. Acknowledging this reality is the first step in training correctly. You’re not preparing for a walk in the park; you’re preparing for a full-body workout on an unstable surface.
This table breaks down the difference in effort required, demonstrating how the terrain itself acts as a multiplier on difficulty. As a comparative analysis from Walkhighlands suggests, the demands are fundamentally different.
| Factor | Scottish ‘Moderate’ (5 miles) | Alpine/US ‘Hard’ (5 miles) |
|---|---|---|
| Path Surface | 50% boggy/tussocky ground | 90% defined trail |
| Navigation Requirement | Constant compass/map use | Occasional waypoint checking |
| Energy Multiplier | 2.5x standard pace | 1.3x standard pace |
| Mental Fatigue Factor | High (continuous route-finding) | Low (follow marked trail) |
| Weather Impact | Severe (exposure on all sections) | Moderate (tree cover available) |
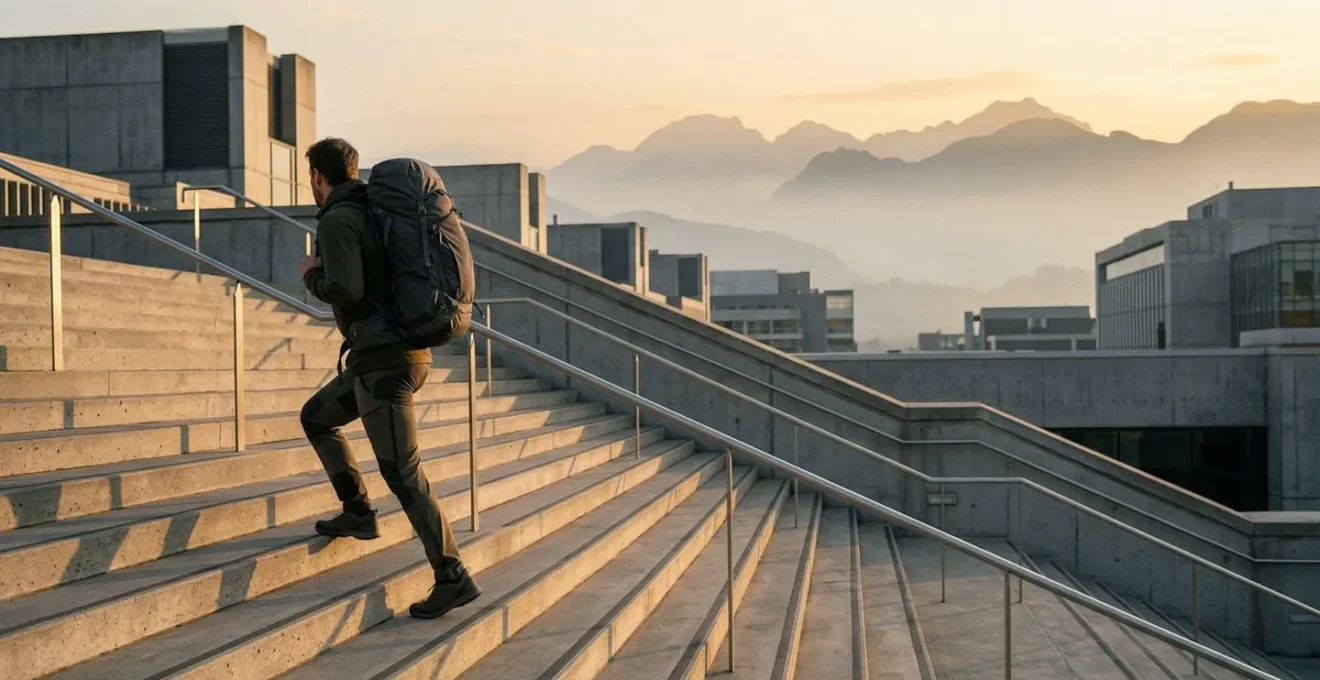
As the image above illustrates, the challenge is textural. Your training must therefore focus on building stability and eccentric strength through exercises like single-leg squats, weighted step-downs, and walking on uneven surfaces (like a sandy beach or a deliberately off-path parkland) to simulate this constant instability.
Lyme Disease Risk: How to Check Yourself After a Hike in Bracken?
Part of building terrain resilience is learning to manage the invisible risks of the environment. In the Scottish Highlands, particularly in areas with bracken and long grass, ticks and the potential for Lyme disease are a serious concern. While the risk shouldn’t deter you, ignoring it is negligent. According to Scottish outdoor safety guidelines, more than 85% of tick bites occur between April and October, with peak activity at dawn and dusk. Your preparation must include a non-negotiable, systematic check protocol after every single day of hiking.
Ticks are drawn to warm, hidden areas of the body, making a quick glance insufficient. A thorough check is your best defense against a bite becoming an infection. This is not a task to be rushed or postponed. Making it a routine part of your post-hike ‘cool down’ is essential for long-term health and safety. The key is to be meticulous and to perform the check within a few hours of finishing your hike.
Follow this complete tick check protocol to minimize your risk. This is a system, not a suggestion, and should be treated with the same seriousness as checking your map.
- Immediate Check (within 2 hours): Before even entering your accommodation, inspect ankles, waistband, armpits, and behind the knees. Use your phone’s camera for hard-to-see areas.
- Full-Body Scan at Accommodation: Strip completely in a well-lit area. Run your fingers through your scalp, inspect behind your ears, and thoroughly examine your groin and navel areas.
- Gear Quarantine: If possible, leave boots, socks, and your backpack outside or in a sealed bag for 24 hours. Ticks can be carried in on your gear.
- Tick Removal: If you find a tick, use fine-tipped tweezers to grasp it as close to the skin as possible. Pull upward with steady, even pressure. Clean the bite area with an antiseptic wipe or soap and water.
- Documentation: Photograph any attached tick and the bite location. Note the date and location of the hike. This information can be crucial if you develop symptoms later.
The Check-In Protocol That Saves Lives for Solo Hikers
Whether you hike alone or in a small group, you are responsible for your own safety net. In the remote expanses of the Highlands, where mobile signal is a luxury, a simple check-in protocol is one of the most effective life-saving tools you have. It’s the ultimate ‘failure-proof’ system. Should something go wrong—a fall, disorientation, sudden illness—this protocol is what triggers a response. Relying on a vague “I’m going for a walk in Glencoe” text is dangerously inadequate.
Mountain Rescue teams emphasize that the quality of the information they receive is critical. An analysis highlighted by UK Mountain Rescue services shows that hikers who leave a detailed plan are located up to 75% faster than those who do not. This time difference can be the margin between a rescue and a recovery. Your plan should be left with a reliable contact who is not on the trip with you and who understands the escalation procedure.
The core of this system is the ‘Route Card Plus’. This document should be meticulously prepared and include OS grid references for your planned route, potential escape routes, a description of your clothing and pack, your car’s location, and your contact details. This, combined with an agreed-upon timeline, creates a robust safety plan.
- T+0 (Expected return time): Your safety contact attempts a phone call.
- T+30 minutes: Your contact sends a text message and attempts a second call.
- T+1 hour: Your contact calls your accommodation to verify you have not returned.
- T+2 hours: Your contact calls Police Scotland (dial 101) and provides them with all the details from your Route Card Plus.
- T+2.5 hours: The police will initiate a Mountain Rescue callout if the situation and conditions warrant it.
Leather or Synthetic: Which Boot Dries Faster for Multi-Day Hikes?
Your choice of footwear is pivotal in managing the ‘energy tax’ of the Highlands. On a multi-day trek, you can almost guarantee your boots will get wet, not just from rain but from walking through countless boggy patches and streams. Wet boots are heavy, uncomfortable, and a primary cause of blisters and morale-sapping misery. The debate between leather and synthetic often comes down to one critical factor in Scotland: drying time.
While modern waterproof membranes like Gore-Tex are effective, they are not infallible. Constant immersion will eventually lead to ‘wet-out’, where the outer material becomes saturated. From that point on, the material’s properties become crucial. Leather tends to hold its shape better when soaked but absorbs more water and takes significantly longer to dry. Synthetic boots absorb less water, feel lighter when wet, and dry much faster overnight in a tent or bothy. For a multi-day trip where you cannot guarantee a warm, dry room each night, this is a significant advantage.
This data, based on performance in typical wet Scottish conditions, shows the clear trade-offs between the two materials. For multi-day self-supported hikes, the lower saturated weight and faster drying of synthetics are often decisive.
| Characteristic | Leather Boots | Synthetic Boots |
|---|---|---|
| Weight When Dry | 800-1000g per boot | 600-750g per boot |
| Weight When Saturated | 1200-1400g (+50%) | 750-900g (+25%) |
| Overnight Drying (Tent) | 20-30% moisture reduction | 40-60% moisture reduction |
| Performance While Wet | Maintains shape, heavy | Lighter but less supportive |
| Gore-Tex Wet-Out Time | 4-6 hours constant immersion | 3-5 hours constant immersion |
Regardless of your boot choice, an active management system is essential. You cannot simply take off wet boots and expect them to be dry in the morning. Follow this protocol every evening:
- Evening Protocol: As soon as you stop, remove insoles. Stuff boots with a microfiber towel for 30 minutes to absorb bulk moisture.
- Overnight Setup: Replace the towel with dry spare socks, newspaper, or a dedicated boot dryer. Position boots for maximum airflow, ideally near a tent vent.
- Morning Routine: If boots are still damp, use a waterproof sock system: a thin liner sock, a waterproof sock (like Sealskinz), and then your merino wool outer sock. This keeps your feet dry even inside a wet boot.
- Spare Sock Rotation: Carry at least three pairs of quality merino wool socks. Rotate them every 4-6 hours, strapping the used pair to the outside of your pack to dry as you walk.
The Composition Error That Leads to Falls on Highland Ridges
Your physical training in a flat city can build a strong engine, but Highland ridges demand technical skill and balance, especially in the wind. Many falls don’t happen from a lack of strength, but from a critical ‘composition error’ in how a hiker reacts to their environment. The most common mistake is purely instinctive: when hit by a strong gust of wind, hikers lean into it. This action dangerously narrows their base of support and raises their center of gravity, making them vulnerable.
According to an analysis of ridge incidents by mountain rescue professionals, this instinctive lean is a factor in a staggering 70% of wind-related falls. The correct, counter-intuitive response is to immediately drop your center of gravity. Crouching low, widening your stance, and turning your body slightly into the wind creates a stable, aerodynamic profile that is vastly more resistant to gusts. Another trap is staring at your feet, which eliminates your peripheral vision and your ability to anticipate terrain changes or incoming gusts.
To walk safely on exposed ridges, you need to replace these flawed instincts with a learned technique. The ‘Scan-Place-Flow’ method, used by professional guides, is a system for maintaining balance and forward momentum without sacrificing awareness.
- SCAN: Keep your head up and look 10-15 feet ahead. Identify your next three to four foot placements while maintaining an upright, balanced posture.
- PLACE: Commit to your foot placement without looking down. Trust the assessment you just made. This builds proprioception and confidence.
- FLOW: Maintain a continuous, rhythmic movement. A stop-start pattern disrupts your balance and makes you more susceptible to wind gusts.
- TRANSITION AWARENESS: Be extra vigilant when moving from a technical, rocky section to what seems like an easy, grassy path. Most balance-related falls occur in these transition zones where concentration drops.
- WIND POSITION: Every few minutes, consciously reassess the wind direction and preemptively adjust your body angle and stance.
Why Summer Weather in Scotland Can Still Cause Hypothermia?
The phrase “summer hypothermia” sounds like a contradiction, but it is a real and present danger in the Scottish Highlands. The air temperature at sea level in July can be a pleasant 15-18°C, but on a Munro summit, it can be drastically different. The combination of lower temperatures at altitude, wind, and rain creates a “lethal triangle” that can rapidly strip heat from your body, even if you feel warm from the effort of climbing.
The most dangerous factor is the wind chill. A moderate 20-mph wind can make a 12°C day feel like 4°C. Add rain to the equation, and the effect is even more severe. Summer rain in the Highlands is often snowmelt from higher ground, with a temperature of just 6-8°C. This cold water accelerates heat loss from your body at an alarming rate. A recent study of West Highland Way hikers found that stopping at a windy summit while wearing a sweat-dampened “breathable” jacket could cause a core temperature drop of 3°C in just 10 minutes. This is the fast track to hypothermia.
The wind chill effect is not subjective; it is a measurable physical phenomenon. This table shows how quickly a pleasant day can turn dangerous on an exposed summit, a scenario confirmed by countless reports from outdoor tour leaders.
| Air Temp (°C) | Wind Speed (mph) | Feels Like (°C) | Hypothermia Risk |
|---|---|---|---|
| 12°C | Calm | 12°C | Low |
| 12°C | 20 mph | 4°C | Moderate |
| 12°C | 30 mph | 1°C | High |
| 10°C | 20 mph + rain | -2°C equivalent | Severe |
| 8°C | 30 mph + rain | -5°C equivalent | Extreme |
The key to prevention is proactive layer management. This means shedding your waterproof layer during strenuous ascents (even in light rain) to prevent sweat buildup. Wear a high-wicking base layer to pull moisture away from your skin. Crucially, you must put on your insulating layer and waterproof shell before you feel cold, such as during any stop or as you approach a windy summit. Waiting until you are shivering is too late; your body is already losing the battle.
Key Takeaways
- Highland ‘moderate’ is a deceptive rating; you must train for the high ‘energy tax’ of boggy, pathless terrain, not just for inclines.
- Your systems for navigation and gear must be ‘failure-proof’ and designed for wet, cold, and isolated conditions where technology will fail.
- Safety is an active system: practice non-negotiable protocols for tick checks, leave a detailed route card, and understand insidious risks like summer hypothermia.
How to Insure High-Risk Outdoor Activities in Scotland for Non-Residents?
The final piece of your preparation puzzle is logistical and financial: insurance. After training your body, mastering your skills, and preparing your gear, ensuring you have the correct insurance coverage is the ultimate safety net. Standard travel insurance policies are often dangerously inadequate for the realities of Highland hiking and mountaineering. As a non-resident, you must scrutinize the fine print to ensure you are covered for the specific activities you plan to undertake.
While Scottish Mountain Rescue is a free service provided by volunteers, this does not cover all potential costs. The helicopter evacuation might be covered, but ambulance transport, hospital stays, and, most critically, medical repatriation to your home country are not. The cost of a medical flight back to the US, Canada, or Australia can be astronomical, easily exceeding £50,000. Your policy must explicitly cover these eventualities. Furthermore, many policies have vague or restrictive definitions of ‘hiking’ that could invalidate your claim.
Before purchasing or relying on an existing policy, you must verify its suitability using a checklist. This isn’t just about ticking a box; it’s about confirming your financial and medical security in a worst-case scenario. Based on guidance from expedition planners like those at National Geographic, your verification should include these points:
- Check Altitude Limit: Does the policy cover activities above 2,000 meters? This is crucial for winter Munro bagging, where summits are often snow-covered and technically exceed this limit.
- Verify Activity Definitions: Does ‘hillwalking’ or ‘trekking’ include scrambling? A Grade 1 scramble, like the famous Aonach Eagach ridge, may be excluded by a standard policy.
- Confirm ‘Off-Piste’ Coverage: Many policies require you to be on a marked trail. Given that many Highland routes are pathless, this clause could render your insurance void.
- Review Rescue Coverage: Even with the free Mountain Rescue service, ensure your policy covers any associated costs, such as helicopter use if deemed necessary for a specific situation.
- Calculate Repatriation Costs: Ensure the medical repatriation coverage is substantial enough to cover a flight from Scotland to your home country with medical staff.
Your physical training has built strength, your skills practice has built competence, and your gear selection has built resilience. Taking the time to verify your insurance is the final, critical step in your preparation. Do it now, and you can embark on your Highland adventure not just with excitement, but with complete peace of mind.