Yes, modern glamping pods are engineered for Scottish winters, but their warmth depends on systemic design, not just a heater.
- Thermal performance is determined by the entire building system: insulation, groundworks, and airtightness are more critical than the heating unit alone.
- Comfort relies on “energy sovereignty”—understanding and managing a finite off-grid power budget to avoid tripping the system with high-drain appliances.
Recommendation: Instead of asking “Is it heated?”, ask “How is it insulated, what is the power system’s capacity, and is it built on well-drained ground?”. This shift in perspective ensures you book a genuinely warm and comfortable winter retreat.
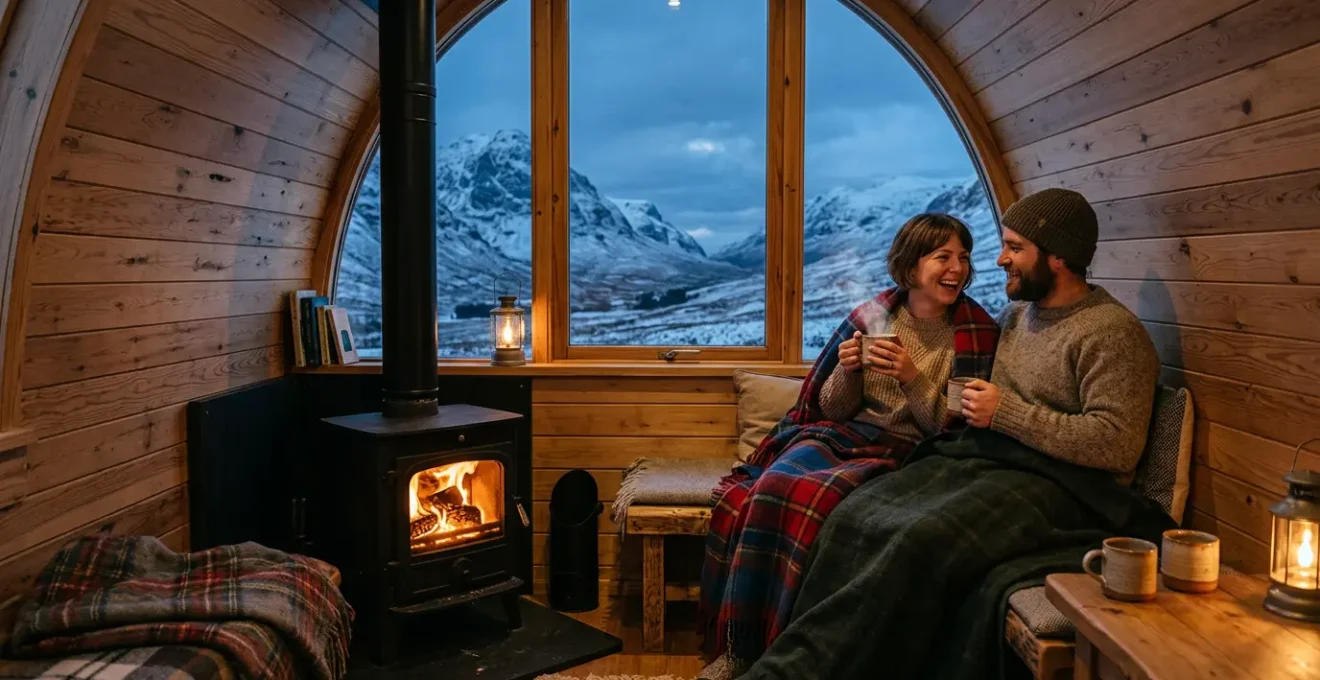
The image of a romantic winter getaway in the Scottish Highlands is powerful: a secluded pod, a glass of whisky, and frost painting the landscape outside. Yet, for many couples, a nagging question undermines this dream: will we actually be warm? The fear of a beautiful but drafty hut, huddled under blankets and listening to the wind howl, is a valid concern. It’s easy to assume that the warmth of a glamping pod is simply a matter of having a good heater, but this common view misses the bigger picture entirely.
As a modular building architect, I can tell you that true winter comfort isn’t a feature you add; it’s a result you engineer. A genuinely warm pod is a high-performance system where insulation, airtightness, ground conditions, and energy management work in concert. The question isn’t whether a pod has a heater, but how the entire structure is designed to retain that heat efficiently and reliably. A pod’s ability to keep you cozy through a December night has less to do with the thermostat’s setting and more to do with its fundamental architectural integrity.
This guide will deconstruct the engineering behind a warm glamping pod. We will move beyond the superficial and analyse the critical systems that define your comfort. We’ll explore why your hairdryer is an off-grid system’s enemy, assess the real value proposition against a hotel room, and understand why the ground beneath your pod is as important as the roof above. By the end, you will be equipped to evaluate a glamping site not just on its picturesque views, but on the soundness of its design, ensuring your romantic escape is a truly warm one.
This article provides a detailed breakdown of the key factors that contribute to a warm and comfortable winter glamping experience. The following sections will guide you through the technical, practical, and environmental considerations for choosing the perfect pod.
Summary: The Architect’s View on Winter-Ready Glamping Pods
- Why You Cannot Use a Hairdryer in an Off-Grid Pod?
- How Close Are the Neighbors in a Glamping Village?
- Pod vs Hotel Room: Is the Price per Square Metre Justified?
- Microwave or Hob: What Can You Actually Cook in a Pod Kitchenette?
- The Bucket Shower: How to Use Low-Tech Facilities?
- How to Calculate Your Amp Usage to Avoid Tripping Campsite Electrics?
- How to Spot Boggy Ground Before You Pitch Your Tent?
- How to Choose a Campsite in Scotland That Actually Has Reliable WiFi?
Why You Cannot Use a Hairdryer in an Off-Grid Pod?
The inability to use a simple hairdryer is often the first, jarring introduction to the concept of “energy sovereignty” in an off-grid pod. It’s not a fault in the system; it’s a fundamental principle of its design. Unlike a home connected to the national grid, an off-grid pod is a self-contained power island. Its electricity comes from a battery bank, often charged by solar panels, and delivered via an inverter. This inverter converts the battery’s DC power to the AC power your devices use, but it has a strict limit on how much power it can deliver at any one time. Your comfort depends on respecting this limit.
A typical hairdryer demands between 1500 and 2000 watts of power. However, most off-grid glamping pods are equipped with inverters limited to a 1000W maximum continuous output. Attempting to run a hairdryer will instantly overload this inverter, causing it to trip and shut down the entire pod’s power supply to protect itself. This isn’t just about the hairdryer; it applies to any high-wattage, heat-generating appliance like an electric kettle or a toaster. The system is engineered for efficiency and longevity, prioritizing low-drain essentials like LED lighting (10-20W), laptop charging (60W), and entertainment.
This design choice is a deliberate trade-off. As seen in modern Scottish sites, the power budget is carefully allocated. Pods often feature amenities like a two-ring hob, microwave, and fridge, with some even including a Sky Glass TV and internet access. These are all relatively low-power devices that can run comfortably within the system’s capacity. The pod is designed for a specific kind of luxury—one of connection to nature and modern entertainment, not high-power personal grooming. Understanding this helps you shift from a mindset of unlimited consumption to one of conscious energy management, which is key to a successful off-grid stay.
Your Power Management Checklist for Off-Grid Pods
- Check the pod’s power specifications before booking: Look for terms like ‘1000W inverter’, ‘200Ah battery bank’, or ‘solar-only’ in listings to understand the system’s limits.
- Identify high-drain appliances to avoid: Hairdryers (1500-2000W), electric kettles (1500-3000W), and toasters (800-1500W) exceed most off-grid inverter capacities.
- Calculate your essential device needs: Phone charging (5-10W), LED lights (10-20W), and a laptop (60W) are all manageable loads that won’t strain the system.
- Time your power usage strategically: Charge devices during sunny daylight hours when solar panels are generating power, not at night when you’re running purely on the battery’s stored energy.
- Pack alternatives to high-power devices: Bring quick-dry microfiber towels instead of relying on a hairdryer, and plan to use the provided gas hob or a camping stove for boiling water instead of an electric kettle.
How Close Are the Neighbors in a Glamping Village?
The romantic ideal of a secluded cabin often clashes with the economic reality of a glamping business. The question of proximity to neighbours is a crucial one, as it balances the guest’s desire for privacy with the operator’s need for a viable business model. From an architectural and site planning perspective, the layout of a glamping village is a carefully considered exercise in “spatial economics.” It’s not about cramming in as many units as possible, but about optimising the land to create a sense of seclusion while ensuring financial sustainability.
The spacing you can expect varies, but a well-designed site uses natural topography and vegetation to create visual and acoustic barriers. Pods might be arranged in small clusters or staggered along a hillside, with each unit oriented to face a specific view, turning its “back” to its neighbours. The goal is to make you feel like you have your own private piece of the landscape, even if another pod is only 20 or 30 metres away. This strategic placement is a hallmark of a high-quality glamping experience.
This visual separation is highly effective, and the proof lies in the performance of these sites. A case study of a North Coast 500 site showed that five glamping pods operating on just 0.13 acres generated £2.3 million per acre in revenue, with peak occupancy near 100%. This demonstrates that a relatively dense configuration does not deter guests, provided the design successfully creates a feeling of privacy. Guests are booking the experience of seclusion, which is an architectural illusion, as much as they are booking the physical space. The best sites master this illusion, allowing you to enjoy the communal spirit of a campsite with the privacy of a hotel room.
Pod vs Hotel Room: Is the Price per Square Metre Justified?
When comparing the nightly rate of a luxury glamping pod to a standard hotel room, a simple price-per-square-metre calculation can be misleading. A pod may offer less interior floor space—typically 15-25 square metres compared to a hotel’s 25-35—but its value proposition is entirely different. You aren’t paying for empty space; you are paying for a highly engineered, self-contained unit packed with amenities and an immersive connection to nature that a city-centre hotel cannot offer. From an investment standpoint, this model is highly effective, as each glamping pod in successful Scottish sites generates an average annual revenue of £59,143, justifying the premium experience provided.
The justification for the price becomes clear when you analyze the features included. A standard hotel room offers a bed and an ensuite. A modern Scottish glamping pod, designed for winter, offers far more. The real value is in the bundled experience: the private outdoor space, the direct access to hiking trails, and the unique amenities that are rarely standard in a hotel. This is where the architectural design delivers its highest value.
The following table breaks down the value comparison beyond simple floor area, showing that the pod often includes high-value features like kitchen facilities and private hot tubs, which would be expensive add-ons or unavailable in a typical hotel stay. The price reflects an all-inclusive experience, not just a room.
| Feature | Scottish Glamping Pod | Standard Hotel Room |
|---|---|---|
| Average Nightly Rate (Winter) | £175-220 | £80-150 |
| Square Metres | 15-25 | 25-35 |
| Private Hot Tub | ✓ Included | ✗ Rare |
| Kitchen Facilities | ✓ Hob, microwave, fridge | ✗ Usually none |
| Nature Immersion | ✓ Direct access | ✗ Urban setting |
| Heating System | ✓ Full heating | ✓ Central heating |
| WiFi & Entertainment | ✓ Free internet, Sky TV | ✓ Standard WiFi, TV |
Microwave or Hob: What Can You Actually Cook in a Pod Kitchenette?
The kitchenette in a glamping pod is a marvel of space-efficient design. It’s not intended for preparing a three-course banquet, but it is perfectly engineered for creating simple, hearty, and warming winter meals. Typically equipped with a two-ring hob, a microwave, and a small fridge, the setup encourages a “one-pot” cooking style. This approach is not just a matter of convenience; it’s also a crucial part of managing the pod’s internal environment. Excessive boiling and frying can create high levels of steam and condensation, which is something to be managed in a small, well-sealed thermal envelope.
The provided appliances are chosen for their low power draw and efficiency. The hob (often gas) provides instant, controllable heat perfect for simmering stews or pan-frying local produce. The microwave offers a quick way to heat soups or prepare porridge without generating excess ambient moisture. The key to a successful pod-cooking experience is planning. Thinking in terms of meals that can be cooked in a single pan or pot not only simplifies the process but also helps maintain a comfortable and dry atmosphere inside your cozy retreat. This is engineered comfort in practice.
Embracing these limitations can become part of the charm. Cooking a Scottish lentil stew on the hob not only fills the pod with a delicious aroma but also contributes a gentle, dry heat to the space. It’s about working with the systems provided to enhance your comfort. The following list offers some practical ideas for simple yet satisfying meals that are perfectly suited to the typical pod kitchenette, turning a potential constraint into a delightful part of your winter glamping experience.
One-Pot Winter Meal Ideas for Pod Kitchenettes
- Scottish Lentil Stew: Use the two-ring hob to simmer lentils, root vegetables, and local sausage in one pot for a hearty meal that adds ambient heat.
- Highland Hot Pot: Layer sliced potatoes, lamb, and onions in a covered pan on low heat for 45 minutes – this method produces minimal steam.
- Microwave Porridge Plus: Prepare traditional Scottish porridge in the microwave, then use the hob to warm local honey and a whisky cream topping.
- Seafood Skillet: Pan-fry local salmon or scallops with butter and herbs on one ring while warming pre-cooked neeps and tatties on the other.
- Warming Soups: Heat quality ready-made Cullen Skink or Scotch Broth on the hob while toasting oatcakes in a dry pan.
The Bucket Shower: How to Use Low-Tech Facilities?
The term “glamping” can sometimes conjure outdated images of basic, low-tech facilities—the dreaded “bucket shower” or a chilly dash to a communal toilet block. While this may have been true in the early days of the industry, the modern Scottish glamping market has evolved dramatically. The expectation for comfort and convenience has driven a significant shift towards fully-serviced, high-specification pods, making the bucket shower a relic of the past. Today, the question is less about “how to use” low-tech facilities and more about appreciating the sophisticated, high-tech systems that have replaced them.
The market has bifurcated. On one end, basic glamping pods still feature sleeping platforms with electric lights and charging sockets, which do require guests to use shared campsite showers. However, the premium end of the market, especially for winter stays, has moved far beyond this. Many sites now offer fully insulated pods equipped with robust heating, wood-burning stoves, and private, well-appointed shower rooms with instant hot water. Some even feature luxury add-ons like private hot tubs. This evolution represents a fundamental shift in design philosophy, from providing basic shelter to engineering a complete, self-contained luxury experience.
Guest expectations have driven this change, and reviews confirm its success. It’s common to see feedback praising the quality of the onboard facilities, such as one guest at a popular site who noted, “We love that it’s open all year and has an amazing shower and communal room.” This demonstrates that modern pods are not just warm, but they also provide the amenities expected of high-end accommodation. When booking a winter stay, you should expect and look for en-suite facilities. The “low-tech” challenge has been solved by better engineering, allowing you to focus on enjoying the warmth and the view.
How to Calculate Your Amp Usage to Avoid Tripping Campsite Electrics?
While the previous sections focused on fully off-grid pods, many glamping sites offer units connected to a campsite-style electrical hook-up. These systems, however, are not the same as your home’s supply. They are typically limited to 10 or 16 amps, and exceeding this limit will trip the breaker, plunging you into darkness. Understanding your power consumption is therefore essential for a smooth stay. The calculation is simple: Watts / Volts = Amps. In the UK, the voltage is 230V, so a 2300W device will draw exactly 10 amps (2300 / 230 = 10). This means you must carefully manage which appliances you use simultaneously.
The core of this energy management is understanding the power draw of your devices. The pod’s own systems, like heating and lighting, are designed to be efficient. The risk comes from the personal devices you bring. A travel kettle (1000W) and a laptop charger (60W) can run together on a 10A supply, but add a fan heater (1500W), and you will instantly exceed the limit. For a truly comfortable winter stay, especially if you rely on personal devices, a robust power system is crucial. In fact, power system calculations show that winter glamping requires a minimum battery capacity of 1,500-2,000Wh for 24 hours of comfortable use in a fully off-grid scenario, which underscores the significant energy demands of winter comfort.
To avoid any issues, it’s vital to know the approximate power draw of common items. The table below provides a clear overview of typical device consumption, helping you to budget your amp usage effectively. By adding up the wattage of the devices you plan to use at the same time and ensuring the total remains below your site’s amp limit (e.g., 2300W for 10A), you can enjoy a trip-free experience. This proactive approach is part of the mindset required for modern, system-aware camping.
This table breaks down the energy consumption of typical devices you might use, allowing you to plan your usage and avoid overloading the electrical system.
| Device | Power Draw (Watts) | Daily Usage (Hours) | Total Wh/Day |
|---|---|---|---|
| LED Lights (4 bulbs) | 40W | 6 | 240Wh |
| Phone Charging (2 phones) | 10W | 4 | 40Wh |
| Laptop | 60W | 4 | 240Wh |
| Small Heater Fan | 50W | 8 | 400Wh |
| 12V Cooler | 45W | 12 (50% duty) | 270Wh |
| WiFi Router | 10W | 24 | 240Wh |
| Total Daily Consumption | – | – | 1,430Wh |
How to Spot Boggy Ground Before You Pitch Your Tent?
While you won’t be pitching a tent, the principle of assessing ground conditions is even more critical when choosing a glamping pod for a winter stay. A pod’s warmth and comfort are fundamentally tied to what lies beneath it. Scotland’s climate is notoriously wet, and a pod built on poorly drained, boggy ground will be a constant source of cold and dampness, no matter how good its heater is. The cold from the waterlogged earth will radiate up through the floor, a phenomenon known as “cold bridging,” creating cold spots and making the heating system work much harder. True thermal integrity starts from the ground up.
Expert site developers understand this. They choose elevated, well-drained locations or invest heavily in groundworks and foundations. A pod raised on stilts or a substantial platform is architecturally superior to one sitting on a simple ground-level slab in a damp climate. This elevation creates a crucial air gap that insulates the floor from the cold, wet ground. The ability of a site to operate year-round is often the clearest indicator of proper site engineering. A case study of the Howe of Torbeg site, which is noted for its year-round operation, reveals that its pods overlook a stream but are positioned in a way that avoids light pollution, suggesting an elevated and well-drained location that is key to its winter viability.
Before you book, you can become a remote surveyor. Use satellite views on mapping services to check a site’s topography. Is it in a low-lying, marshy-looking hollow or on a gentle slope? Read guest reviews specifically from the winter months, looking for keywords like “damp,” “muddy,” or “cold floors,” which are red flags for poor drainage. The best-engineered sites will proudly mention their “panoramic views” or “hillside location,” as these are not just marketing terms but also signals of sound architectural placement.
Pre-Booking Site Assessment Checklist
- Check satellite imagery for water features: Avoid pods positioned in valley bottoms or within 50 meters of streams that could create damp microclimates.
- Look for elevated positioning indicators: Phrases like ‘hillside location’, ‘panoramic views’, or ‘elevated position’ in the description suggest better drainage.
- Review seasonal availability: A site’s year-round operation indicates proper drainage infrastructure, while one ‘closed November-March’ may suggest boggy conditions.
- Examine pod foundation type in photos: Look for pods on raised platforms or stilts, as they perform better than ground-level slabs in wet Scottish conditions.
- Read winter reviews specifically: Guest comments about ‘cold floors’, ‘dampness’, or ‘muddy access’ are red flags for poor ground conditions and inadequate site engineering.
Key takeaways
- True warmth is engineered, not just heated. Look at insulation, foundations, and airtightness.
- Power is finite. Understand the pod’s electrical system and manage your usage to avoid tripping breakers.
- Value is in the experience, not the square footage. Pods offer amenities and nature access that hotels cannot match.
How to Choose a Campsite in Scotland That Actually Has Reliable WiFi?
In our hyper-connected world, the question of reliable WiFi often tops the list of priorities, even for a nature retreat. However, when it comes to a Scottish winter glamping experience, it’s worth challenging this assumption. While many premium sites do offer excellent connectivity, the relentless pursuit of a perfect signal might be at odds with the very purpose of the trip. The ultimate luxury of a winter pod stay isn’t streaming a movie; it’s the profound comfort and security you feel while the wild weather rages outside. It is an experience of being sealed in a warm, cozy, and engineered bubble.
As one Digital Wellness Expert put it, “The experience of being truly ‘sealed in’—warm, cozy, and unreachable—is the entire point.” There is a unique magic to disconnecting, to allowing the rhythm of your stay to be dictated by daylight and weather rather than by notifications and emails. This perspective suggests that perhaps the best-equipped campsite isn’t the one with the fastest broadband, but the one with the most robust insulation, the most reliable heating, and the most breathtaking, uninterrupted views. From an architectural standpoint, the investment in thermal performance and structural integrity delivers a far more essential form of comfort than an investment in network repeaters.
Of course, for some, connectivity is non-negotiable. In that case, the rules are simple: trust recent reviews over marketing promises, check cellular coverage maps for the area as a backup, and don’t be afraid to contact the site owner directly to ask about the nature of their internet service (e.g., satellite, fibre). But it’s worth noting that even in a market where despite lower winter occupancy of 20-30%, many remote sites thrive. This indicates that guests are seeking something more fundamental than a strong WiFi signal. They are seeking warmth, security, and a genuine escape. So, before making WiFi your deciding factor, consider if the true luxury you’re after is the ability to connect to the internet, or the permission to disconnect from everything else.
By shifting your focus from a simple checklist of amenities to a deeper understanding of the pod as an engineered system, you empower yourself to choose a truly exceptional winter retreat. The next step is to apply this architectural perspective to your search, ensuring your romantic getaway is as warm and comfortable as it is beautiful.